
How to Create a Mega Menu Using ElementsKit and Elementor: A Step-by-Step Guide

Let’s talk about navigation menus. We all know that a cluttered menu can confuse users, while a well-designed menu can guide them straight to where they want to go. That’s where mega menus come in — large dropdown menus that make navigating your website seamless.
And guess what? With ElementsKit and Elementor, creating a mega menu is easier than you think. I’ll walk you through it step-by-step, and you’ll have a sleek, functional menu in no time.
Step 1: Install the ElementsKit Plugin
First things first, we need ElementsKit. Here’s how to get it:
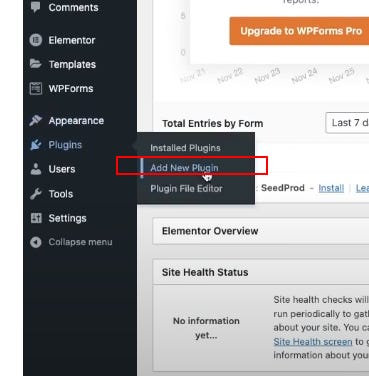
Log into your WordPress dashboard.
Go to Plugins > Add New.
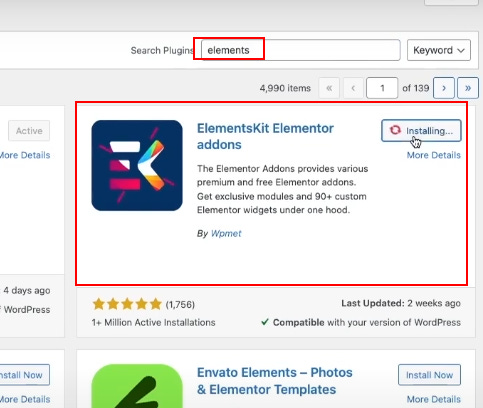
Search for ElementsKit in the search bar.
Click Install Now, then Activate.
Boom! ElementsKit is ready to go.
Step 2: Enable Mega Menu in ElementsKit
Now that ElementsKit is active, let’s enable the mega menu feature:
Navigate to ElementsKit > Modules from the WordPress menu.
Toggle Header Footer and Mega Menu to “ON.”
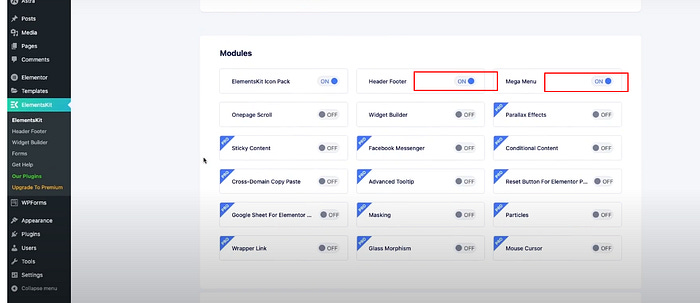
These modules are the secret sauce for building your mega menu.
Step 3: Create a Mega Menu Template
Next, we’ll design the template for your mega menu:
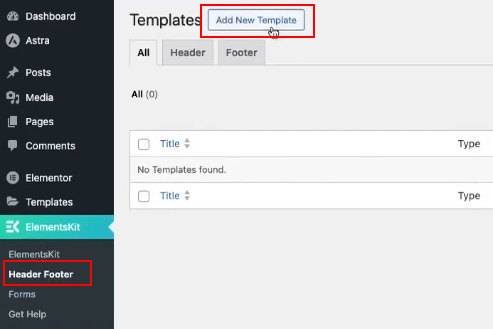
Go to ElementsKit > Header Footer.
Click Add New Template.
Name your template (e.g., “Mega Header”), set the Type to “Header,” and apply it to your entire site.
Toggle Activate and hit Save Changes.
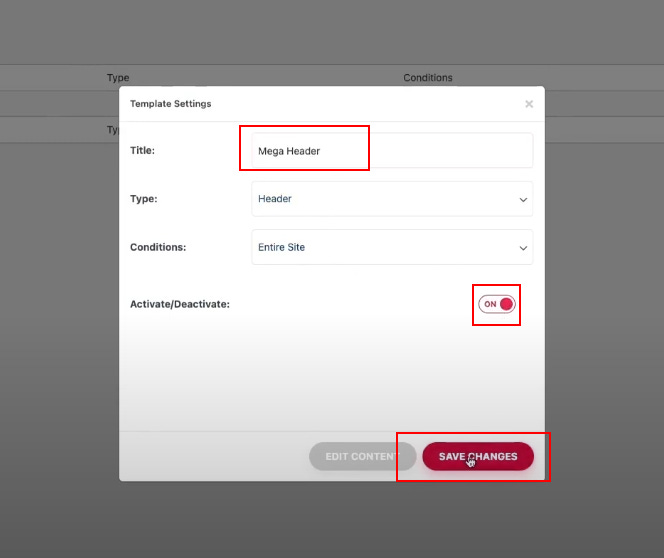
Now your mega menu template is ready to be customized.
Step 4: Add the Mega Menu to Your Site
Time to integrate the mega menu into your navigation:
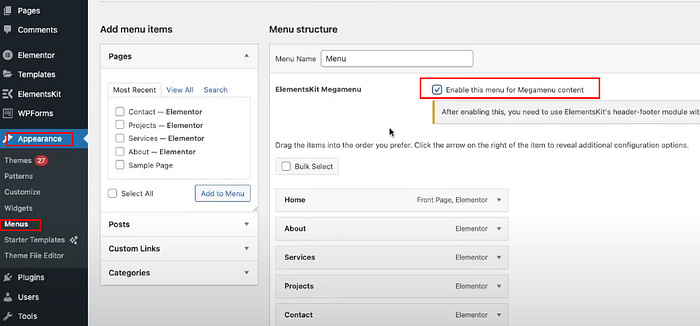
Go to Appearance > Menus in WordPress.
Add the items you want in your menu (e.g., Home, About, Services).
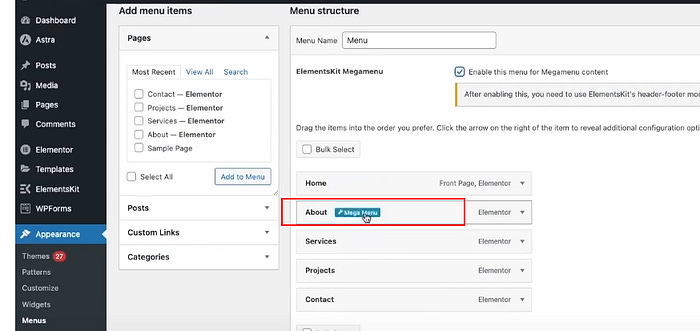
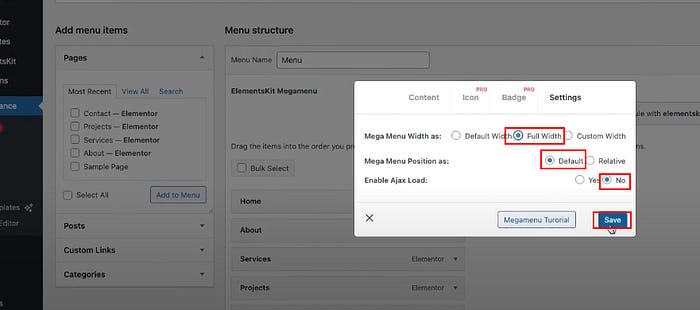
Enable the ElementsKit Mega Menu feature for the specific menu item (like “About”).
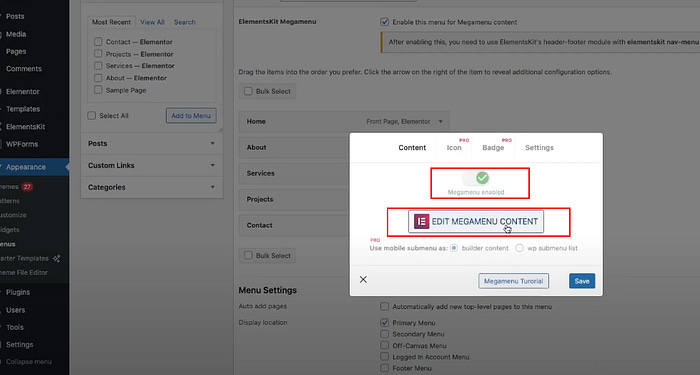
Click Edit Mega Menu Content to start designing.
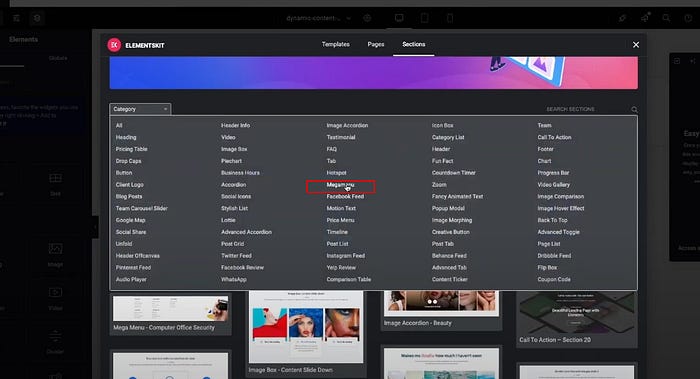
Step 5: Customize Your Mega Menu Design
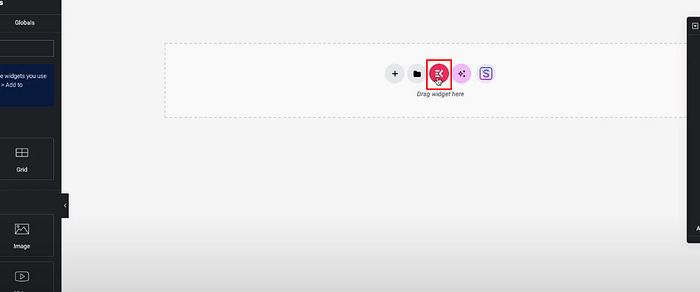
Here’s where the fun begins! With Elementor, you can design the mega menu just like you’d design a page:
Drag and drop widgets like text, images, or buttons into the menu.
Add sections for better organization (e.g., categories, featured items).
Use ElementsKit widgets like Icons or Image Hover Effects to make it pop.
Once you’re happy with the design, hit Save Changes.
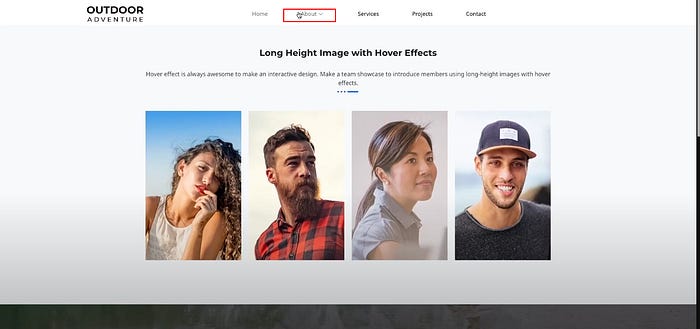
Step 6: Preview and Finalize
Don’t forget to preview your mega menu before going live. Navigate to your website and hover over the menu item to see your masterpiece in action. Smooth transitions? Easy navigation? If yes, pat yourself on the back — you’ve nailed it!
Why Use a Mega Menu?
Still wondering if a mega menu is worth the effort? Here’s why they’re a game-changer:
Improved Navigation: Perfect for websites with lots of categories or products.
Better User Experience: Users can find what they need faster.
Customizable Design: Tailor it to match your website’s look and feel.
Final Thoughts
Creating a mega menu with ElementsKit and Elementor is simpler than it sounds. With just a few steps, you can give your visitors a clean, user-friendly navigation experience that keeps them coming back.
If you enjoyed this guide and want more tips like this, consider subscribing to my Substack newsletter. I share easy-to-follow tutorials, actionable insights, and the occasional dose of inspiration to help you build better websites.
What’s the first thing you’ll add to your mega menu? Let me know in the comments!