


How to Add Alt Text to an Image: A Simple Guide That Matters

Hey there, Let’s talk about something that might seem small but is actually a game-changer for your site: alt text (alternative text). It’s one of those things that’s easy to overlook but packs a big punch when it comes to accessibility, SEO, and user experience.
Don’t worry, adding alt text isn’t rocket science. In fact, it’s so simple that by the end of this guide, you’ll wonder why you didn’t do it sooner. So, grab a coffee, and let’s dive in together.
What is Alt Text, and Why Should You Care?
Alt text is a short description you add to your images. Here’s why it matters:
Accessibility: Alt text helps visually impaired users understand what’s in your images through screen readers.
SEO Boost: Search engines can’t “see” images, but they can read your alt text to understand what’s on the page.
Fallback for Broken Images: If an image doesn’t load, the alt text will appear in its place, giving context to your users.
In short, alt text is your website’s secret weapon. Now, let’s set it up step by step.
Step 1: Log Into Your WordPress Dashboard
First things first, log into your WordPress admin panel. You know the drill.
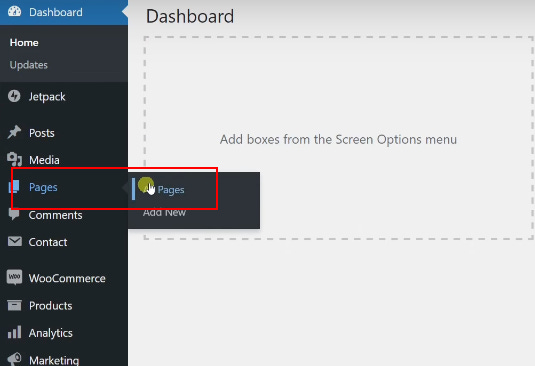
Once you’re in, head to the left-hand menu.
Click Pages and then All Pages to see a list of your website’s pages.

Step 2: Select the Page You Want to Edit
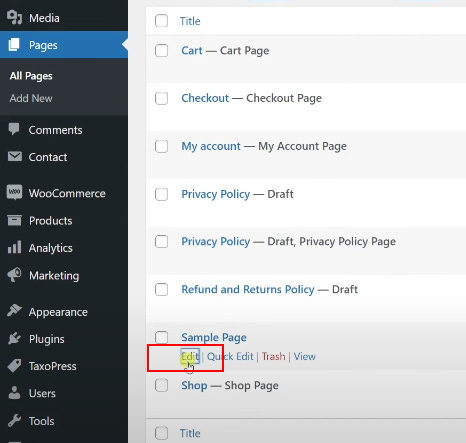
Find the page that contains the image you want to add alt text to. Here’s what to do:
Hover over the page title in the list.
Click Edit to open the page in the WordPress Block Editor.

Easy so far, right? Let’s keep going.
Step 3: Add or Edit Alt Text for Your Image
This is the heart of the process—adding or updating the alt text.
Click on the image block to select the image you want to edit.
Look to the right-hand Settings panel. Make sure you’re on the Block tab.
Scroll to the Alt Text (Alternative Text) field.
Type in a concise, descriptive text for the image. For example:
Instead of something vague like “coffee,” go for: “Classic espresso machine pouring an espresso shot.”
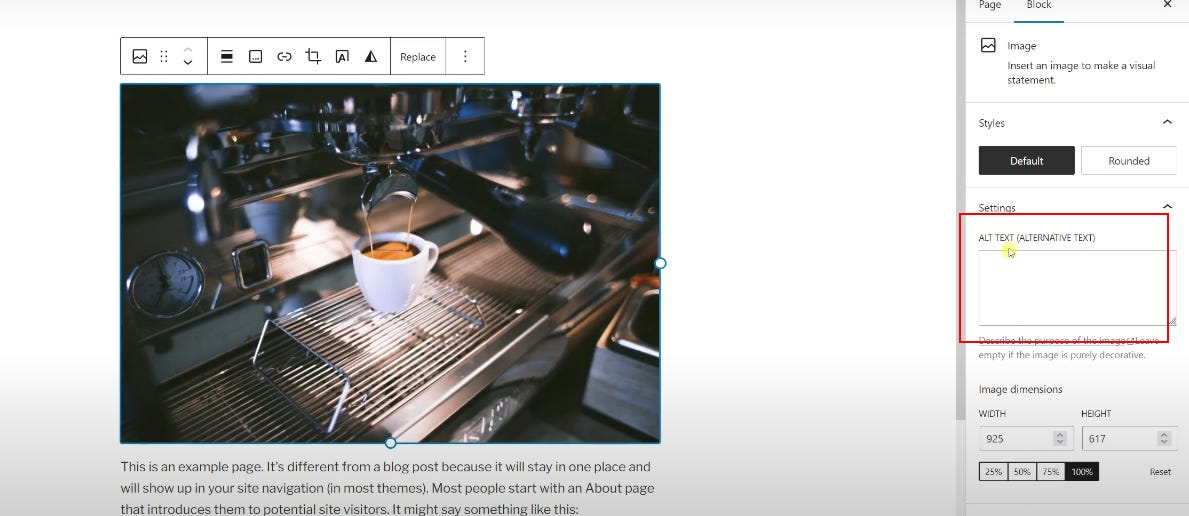
The goal here is to describe the image in a way that’s helpful for users and search engines.
Step 4: Save Your Changes
Don’t forget this part! Once you’ve added or edited your alt text:
Click the blue Update button in the top-right corner.
Wait for WordPress to save your changes.
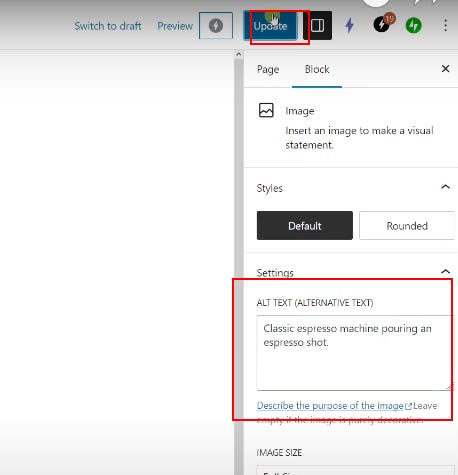
And that’s it! You’re done. Alt text has officially been added.
Pro Tips for Writing Great Alt Text
Not all alt text is created equal. Here are some quick tips to make sure yours stands out:
Be Descriptive, Not Wordy: Short and specific works best.
Include Keywords (Naturally): If it fits naturally, include a relevant keyword, but don’t stuff it in.
Skip “Image of” or “Picture of”: Screen readers already know it’s an image.
For example, instead of saying “Image of a dog,” try: “Golden retriever running on a beach at sunset.”
Why This Matters More Than You Think
Adding alt text might seem like a small detail, but it’s one of those little things that adds up. It’s like putting the cherry on top of your SEO sundae or giving a user with visual impairments a better browsing experience. It’s quick, easy, and it works.
Let’s Wrap It Up
See? That wasn’t so bad. Now your images are not only visually appealing but also functional and accessible. Alt text is one of those tasks that takes seconds but delivers long-term benefits.
If you found this guide helpful, I’d love to have you join my Substack newsletter. It’s packed with tips like this to help you build a better, smarter website. Plus, you’ll get exclusive content I don’t share anywhere else.
Thanks for reading—and happy editing!